Django
DjangoとChannelsで簡単なチャットサーバーを構築(3)
前回からの続きです。 チャンネルレイヤーを有効化 チャンネルレイヤーを使用するためにバックエンドにRedisを使用します。Redisを使用するためにDockerを起動します。 以下のコマンドを実行してRedisを起動しま […]
Filter by Category
前回からの続きです。 チャンネルレイヤーを有効化 チャンネルレイヤーを使用するためにバックエンドにRedisを使用します。Redisを使用するためにDockerを起動します。 以下のコマンドを実行してRedisを起動しま […]
前回からの続きです。 ルームビューを作成 chat > templates > chat > room.htmlを作成します。 ルームビューを表示するためのviewを作成します。 ルームビューへのurl […]
こちらのチュートリアルと同じ内容です。https://channels.readthedocs.io/en/latest/tutorial/index.html 環境 Python 3.7.0Django 2.2.2ch […]
前回からの続きです。
チャンネルレイヤーを使用するためにバックエンドにRedisを使用します。
Redisを使用するためにDockerを起動します。
以下のコマンドを実行してRedisを起動します。
$ docker run -p 6379:6379 -d redis:2.8django_channels/settings.pyの一番下にCHANNEL_LAYERS設定を追加します。
# django_channels/settings.py
# Channels
ASGI_APPLICATION = 'mysite.routing.application'
CHANNEL_LAYERS = {
    'default': {
        'BACKEND': 'channels_redis.core.RedisChannelLayer',
        'CONFIG': {
            "hosts": [('127.0.0.1', 6379)],
        },
    },
}
Djangoシェルを開き、以下のコマンドを実行して、チャンネルレイヤーがRedisと通信できることを確認します。
$ python manage.py shell
>>> import channels.layers
>>> channel_layer = channels.layers.get_channel_layer()
>>> from asgiref.sync import async_to_sync
>>> async_to_sync(channel_layer.send)('test_channel', {'type': 'hello'})
>>> async_to_sync(channel_layer.receive)('test_channel')
{'type': 'hello'}
{‘type’: ‘hello’}が表示されれば成功です。
チャンネルレイヤーができたので、chat / consumers.pyを以下のように修正します。
# chat/consumers.py
from asgiref.sync import async_to_sync
from channels.generic.websocket import WebsocketConsumer
import json
class ChatConsumer(WebsocketConsumer):
def connect(self):
self.room_name = self.scope['url_route']['kwargs']['room_name']
self.room_group_name = 'chat_%s' % self.room_name
# Join room group
async_to_sync(self.channel_layer.group_add)(
self.room_group_name,
self.channel_name
)
self.accept()
def disconnect(self, close_code):
# Leave room group
async_to_sync(self.channel_layer.group_discard)(
self.room_group_name,
self.channel_name
)
# Receive message from WebSocket
def receive(self, text_data):
text_data_json = json.loads(text_data)
message = text_data_json['message']
# Send message to room group
async_to_sync(self.channel_layer.group_send)(
self.room_group_name,
{
'type': 'chat_message',
'message': message
}
)
# Receive message from room group
def chat_message(self, event):
message = event['message']
# Send message to WebSocket
self.send(text_data=json.dumps({
'message': message
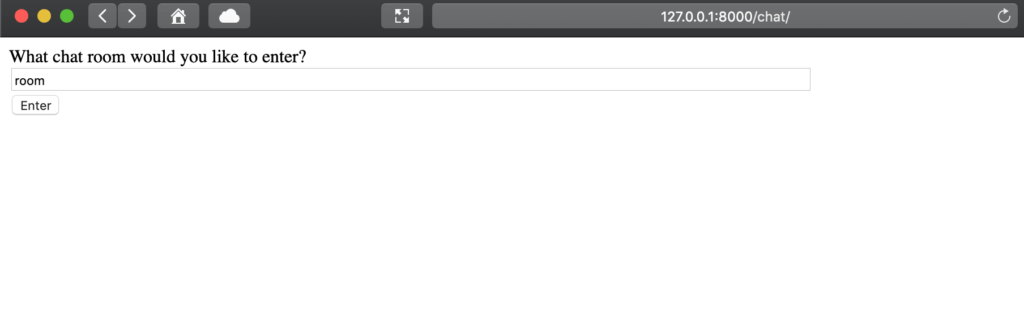
}))テストサーバーを起動して、任意のルーム名を入力してください。
$ python manage.py runserverhttp://127.0.0.1:8000/chat/
にアクセスしてルーム名を入力します。
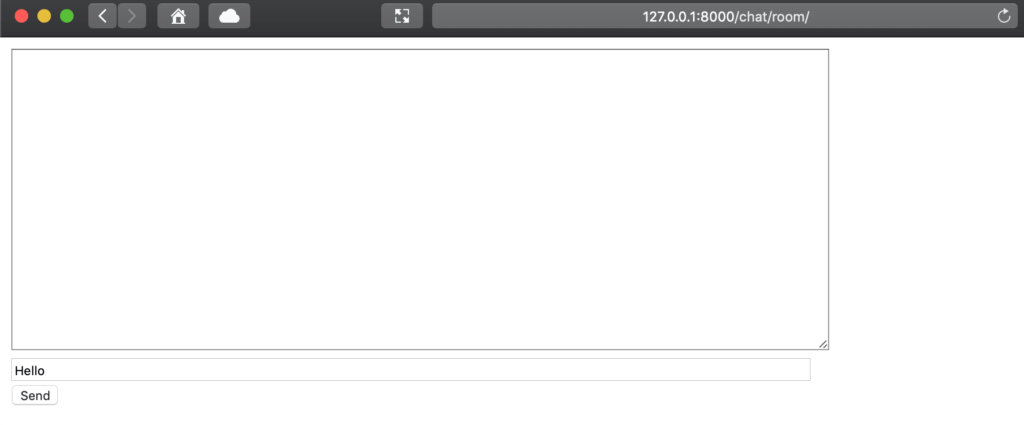
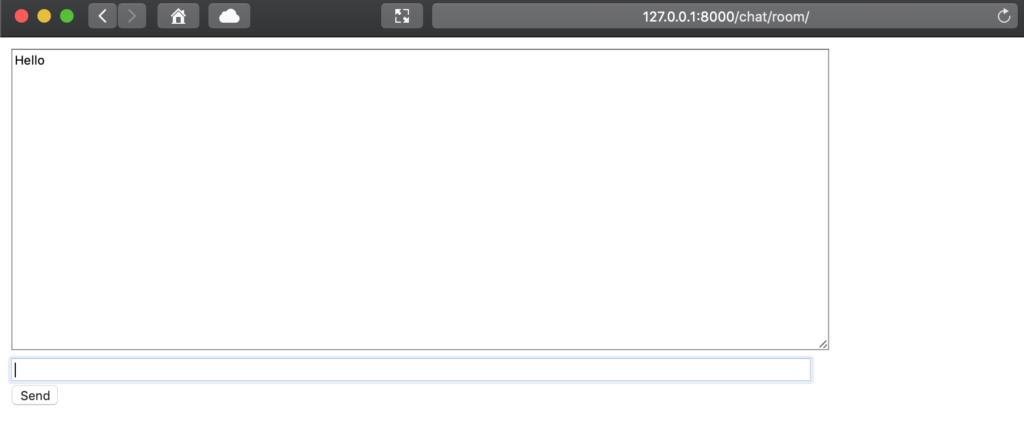
別のタブを開いて同じURLにアクセスしてフォームに”Hello”と入力して、もう一方のタブのチャットログに”Hello”と表示されれば成功です。
群馬県でPythonを使ったAIやソフトウェアを開発している株式会社ファントムが運営しています。
Comments